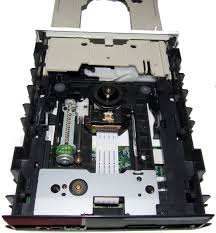
Replacing a computer DVD-ROM Disk Drive in your computer is one of the easiest computer repair jobs you can undertake. Whether you are looking to add more functionality to the computer or are looking to replace a dead drive, this is a task that you will have to face at one point. For this task you will need the replacement DVD-ROM drive and a screw driver to remove any screws that will be holding the computer’s side panels or the damaged drive in place. Follow the steps below to get this done quickly and easily.
Remove the computer’s side panels to gain access to the existing drive. In some computers the panels will be held in place by screws that will need to be unfastened before you can get to the existing drive. If the top panel also needs to be removed to have a better view of the drive and its housing, you will need to do it as well. Make sure you keep track of all the screws removed.
Remove the drive that is being replaced by first disconnecting the data and power cables connected to it. It is important to remove the cables before you begin pulling the drive out so as not to damage any of them. Once the cables are removed unscrew the drive from its position if it is screwed on, or slide it off the rails it is resting on.
Before you install the new drive you need to be sure that it is compatible with the available cables and connections. There are two available connections for DVD-ROM drives, IDE and SATA. The former is connected using a thicker data cable while the latter uses a thinner cable. The power supply cable should also be compatible with the new drive. There are two options when it comes to power cables, MOLEX or SATA. Check to see if they are compatible.
When this is confirmed, insert the new drive into the now empty DVD-ROM drive slot and screw it in if necessary. Plug in the power and data cables. At this point you should note that the drive can be master or slave depending on whether the data cable connecting to it comes from another drive or directly from the motherboard.
Once this is done, replace the computer cover and side panels previously prepared and you can start enjoying the use of your new drive.
