
Our technical co-founder, Albert Tirtohadi, shared on Meteor Meetup Singapore group on how to create an Android cordova based mobile app and package it into a production APK.
The source code is available at Git Hub: https://github.com/tirtohadi/demomobile
The slide deck can be downloaded here
Here is a simple run through:
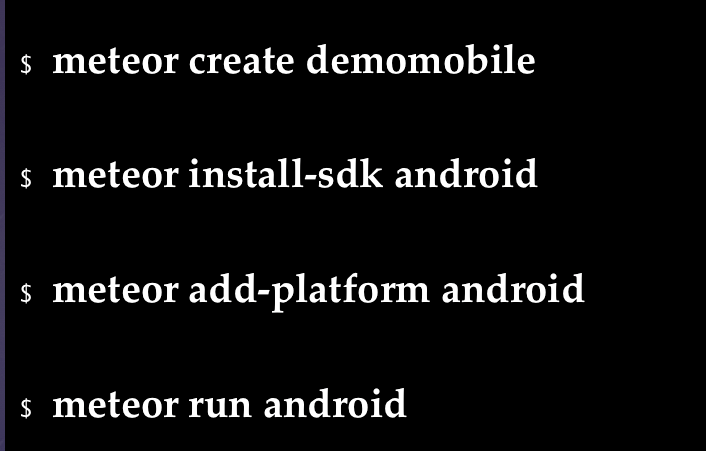
If you have started the Getting started with Meteor, you will probably are familiar with the following steps. Create a new meteor project and make it into a meteor app.
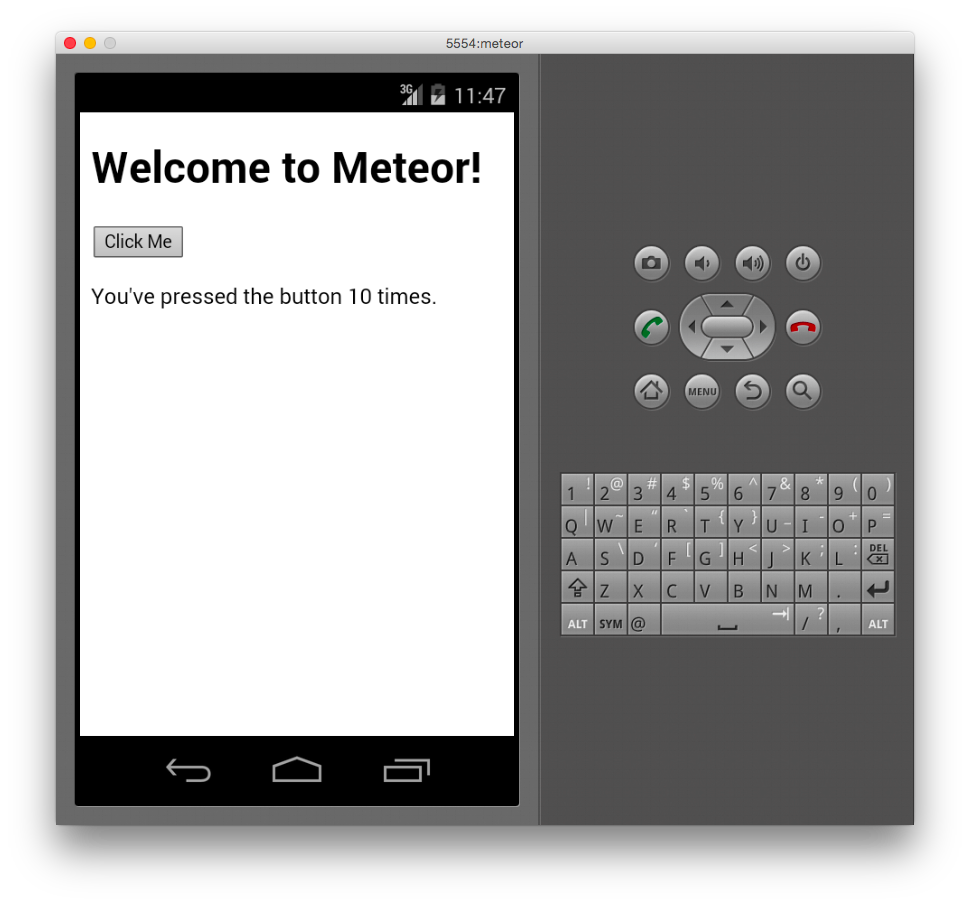
It will create the basic app meteor app with a button and a counter that will increment whenever you click the button. You will be able to run it on an android emulator on your development machine
Let's make things a little bit more interesting by adding a button that will access the camera and are able to take a photo and display it to the screen. The code for the camera feature is shamelessly borrowed from this tutorial
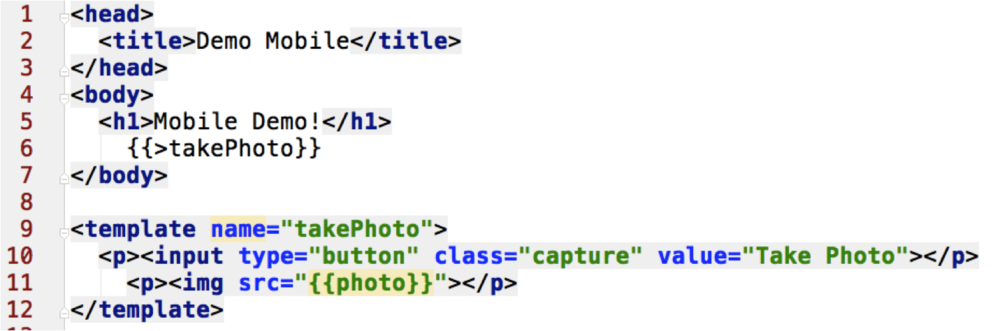
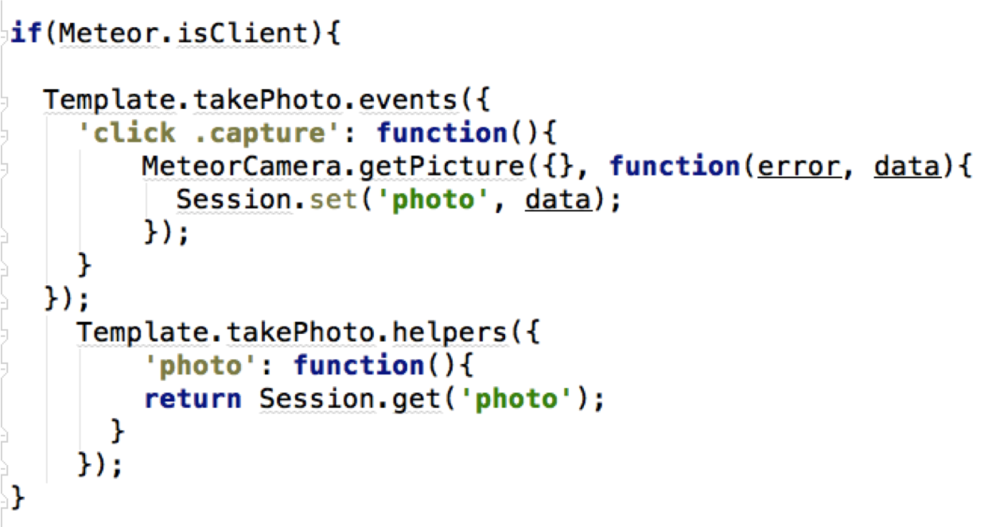
First of all, we need to add the mdg:camera package to our project, and then create a template that will activate HTML5 camera function. This is done through calling MeteorCamera.getPicture method from the package. After taking a picture, we will store the image into a session variable, and reactively display the session variable through a template helper.
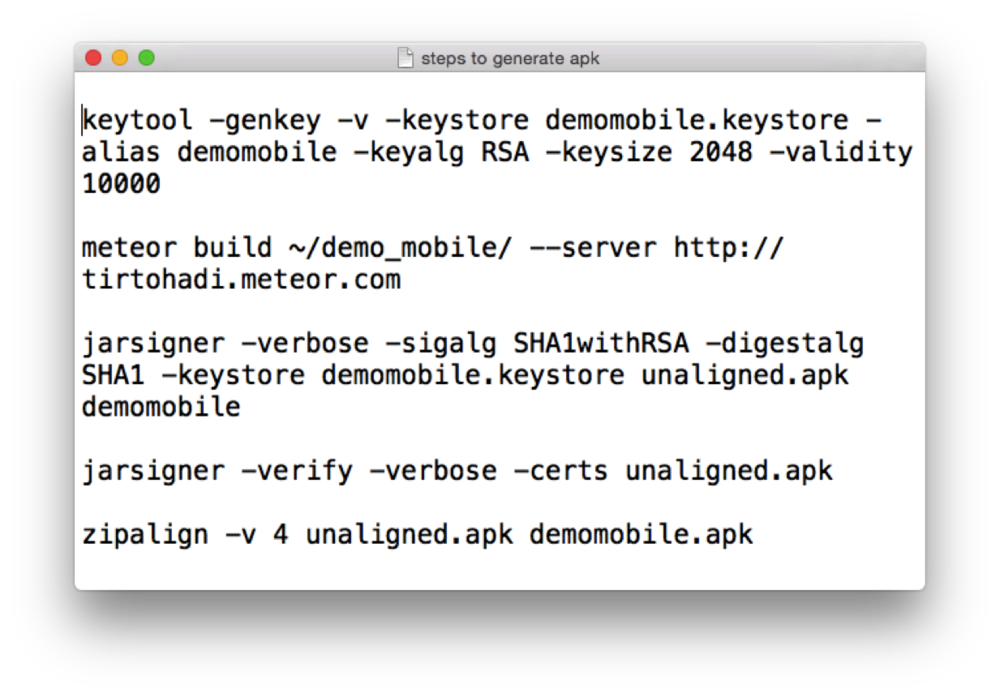
Next, we want to be able to generate a APK that can be installed into a real android device. It will be a lot more fun to take photos using a real device instead of in an emulator. A lot of the documentation out there for generating APK is using the Android Studio for native app. As a meteor developer, I personally prefer not to install Android Studio just to create an APK. Another option is to build the APK using command line tools.
There are a few steps that you need to do. First of all you need to generate a keystore file to store your private key. You only need to do it once. Afterwards you build your meteor app and an unaligned apk will be generated. You will need to sign the apk with your private key and verify it. Last step is to zipalign the apk so that it is memory efficient. Then your APK can be installed into an android device. A more detailed documentation is taken from here, just go to the bottom section, which says Signing Your App Manually.
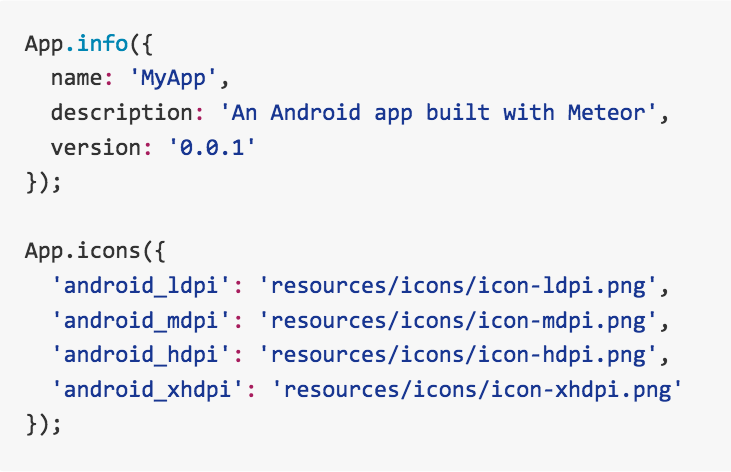
That's it you are done! A point to note is that you can specify your app information, icons, splash screens and preferences in a file called mobile-config.js, you can place it at the root folder of your project.